Making Graviola/Maracujá Juice (Soursop-Passion Fruit Juice)

Yesterday, a friend of mine stopped by with a gift from her back yard. She has a graviola (soursop in English) tree growing there, and we're currently in the middle of the harvest season for graviola here in Fortaleza. She's overwhelmed with graviola, and kindly brought a good-sized one over as a present.
The fruit was very ripe, and I knew I had to do something fairly quickly with it, even though I refrigerated it immediately. I am a total fan of graviola juice, and so decided I would make fresh juice with the aid of my blender. I snooped around the internet a bit before I started, and found a suggestion to add the juice of one maracujá (passion fruit) per jar of graviola juice, which I thought was a wonderful idea. First, because I love maracujá. Second, the highly-acidic juice of the maracujámight cut the sometimes-sticky, custardy flavors of the graviola and would provide just a bit of a bite, which seemed to me would be a good thing. Fortunately, I had a couple of maracujás in the house, so I didn't need to go shopping before beginning.
I started off with one medium-sized graviola, very ripe.
 First, I cut the graviola in half, and with my hands pulled the pulp out from the halves, seeds included.
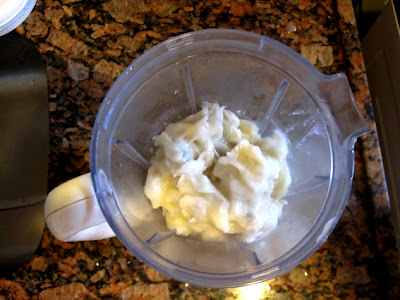
 I placed the pulp in a blender, and blended until the pulp was pureed and smooth. I then strained the pulp through a small sieve to remove the seeds and seed bits, plus any woody remainders of the pulp.

Then I poured the strained graviola puree into a juice car.
 Next up was the maracujá.
 I cut it in half, blended it and strained it just as I had done with the graviola. I was left with a small amount of juice that was very concentrated and acidic.

 I added this maracujá juice to the juice car, plus about 2 cups of cold water to thin down the graviola puree. Brazilian recipes invariably call for the addition of sugar, but after testing I found that the sweetness of the graviola, even with the added maracujá juice, as just right and didn't need additional sweetening.
 The juice was creamy and rich, and absolutely delicious. Pure graviola juice can be overly aromatic and almost cloying in texture and taste, and I thought the maracujá juice was exactly what was needed to avoid both of those problems. The juice still tasted like graviola juice, not maracujá juice. But it was tamed by the presence of maracujá and certainly made more refreshing. From here on out, I'll not make graviola juice without adding that magic ingredient - maracujá.

The fruit was very ripe, and I knew I had to do something fairly quickly with it, even though I refrigerated it immediately. I am a total fan of graviola juice, and so decided I would make fresh juice with the aid of my blender. I snooped around the internet a bit before I started, and found a suggestion to add the juice of one maracujá (passion fruit) per jar of graviola juice, which I thought was a wonderful idea. First, because I love maracujá. Second, the highly-acidic juice of the maracujámight cut the sometimes-sticky, custardy flavors of the graviola and would provide just a bit of a bite, which seemed to me would be a good thing. Fortunately, I had a couple of maracujás in the house, so I didn't need to go shopping before beginning.
I started off with one medium-sized graviola, very ripe.
Then I poured the strained graviola puree into a juice car.
Flavors of Brazil
Comments
Mike
That looks amazing, I bet its tasty as heck! :)
I add graviola in my smoothe or juice with other fruits it really makes an perfect combination, and its healthy too! :)
Amazing soursop benefits
anonymous
Nice
anonymous
I am happy that i have learn of how to make a plain a juice of graviola fruits it my favorite fruit and that is why i am searching in the internet just to learn of how to make a juice out of graviola fruit thanks a lot for the recipes thank you
so much.