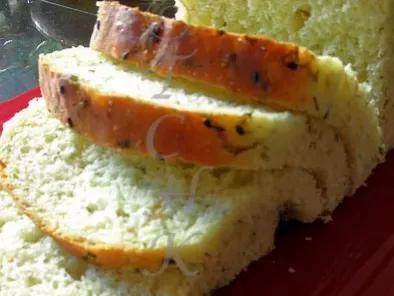
Khara bread / masala bread with dill flavor bangalore iyengar bakery's way
Ingredients
4
For the Masala:
Other Ingredients:
You may like
Butternut burgers (without bread!)
Preparation
Preparation15 min
Cook time1 hour
- Microwave water and milk together for 30 seconds until it is luke warm to touch.Pour this into a wide bottomed bowl.
Dissolve in the sugar and yeast in it and mix thoroughly until dissolved.Leave this aside for 15-20 mins until the yeast mixture becomes frothy. - This is the important step in proceeding further to the recipe.If the yeast does not proof throw it and start the process again from the scratch.
Meanwhile heat olive oil or regular oil in a pan and crackle cumin seeds over low flame and add very finely chopped onion and fry until it is translucent, add a pinch of salt in between to ease the process. - Add coarsely ground chilli paste, chopped greens and mix well and stir fry for a minute.
Add enough salt to it and do remember that we add salt even to the dough. - Keep it aside until the mixture is cooled.Stir in the olive oil and salt to the frothy yeast mixture and slowly add cup by cup of flour into it and mix well, used a wire whisk for this purpose and mix until you get a lump of smooth dough.
- Now put some flour on the broad white board or feel free to use the well cleaned and wiped kitchen platform and take the lump in both hands and knead the bread towards you.
- Follow the same method and knead it properly for 10 minutes roughly until you get a non-sticky but still smooth dough.
Add flour in between when the dough is sticky.
Now slightly press the dough with your hands to flatten it and keep the masala(fried onion-greens) mixture in the centre and fold it from all the sides like how we do for stuffed paratha's. - Slowly start kneading again for 12-15 minutes until the mixture is very well incorporated in the dough.
The dough might become sticky because of the onions,so please feel free to add the flour when required while kneading the dough. - Cover this place of platform or the board with some cloth or paper as we need to use this place again for kneading.
Now grease your hands and a empty big bowl with oil and coat the dough with oil slightly and place it in the greased bowl.
- Cover with a clean kitchen towel and keep it in warm place until the dough doubles almost.It takes almost one to one-and-half hours depending the climatic conditions.
Now again knead the dough gently for 7-8 mins,this process is important as it assures of removing air bubbles formed in the dough.Repeat the process with the other portion as well. - Shape one portion into a loaf and place it in the greased loaf pan(9"x5").Divide the other portion of dough into 4-5 portion and shape them into buns and place them on a baking tray with space in between.Keep them again in the warm place for 45 minutes - 1 hour for the final rise.
- Mean while preheat the oven at 220 degrees for 10 mins when you are about to finish the rising time of bread.Brush the top of loaf and buns with milk very gently and sprinkle black sesame seeds over the nicely risen loaf and buns and keep it in preheated oven and bake them at 180 degrees for 15-20 minutes until the top portion of the bread turn slightly golden and the bread should sound hollow when tapped the crust with hand.
- Brush the top of the bread and buns with butter immediately after removing them from oven.This helps in giving the shine to the crust and also makes the crust softer and even the smell of the bread will be nice.
Run the knife around the edges and slowly remove the bread from the pan and let it cool on the wire rack.Cut into the slices of desired thickness.Apply generously a dollop of fresh butter on the slice before serving.
You tried this recipe ?
Mention @petitchef_en and tag #petitchef
Mention @petitchef_en and tag #petitchef
You may like
-
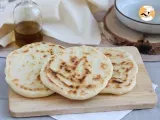 Pita bread - no bake bread
-
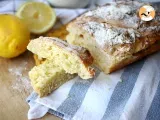 Irish bread - soda bread
-
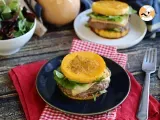 Butternut burgers (without bread!)
-
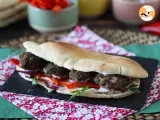 Turkish köfte meatball sandwiches in kebab bread
Questions
Photos of members who cooked this recipe
Comments
Rate this recipe:
There are no comments!