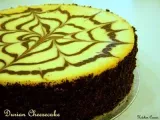
Michael Symon's Beef Cheek Pierogies with Wild Mushrooms and Horseradish (p. 45)
vote now
Michael Symon's Beef Cheek Pierogies with Wild Mushrooms and Horseradish (p. 45) was by far the most fun dish that I've made yet. As you probably know by now, Cleveland's NBC affiliate, WKYC Channel 3 came to my house and filmed me as I made them. This was my first "major" television appearance and I was a little nervous about cooking on camera. At the advice of my friend, Cleveland chef Matthew Mytro, I practiced the making the pierogi dough the night before. Multiple times. I didn't want to blow it on camera. I thought the interview turned out very well. The pig's head in my freezer even got to make an appearance (look for it to make an appearance here when I make the pig's head ragu).
Michael loves to work with offal cuts of meat like cheek meat, sweet breads, liver, marrow, and other cuts of meat deemed inedible by many people. In the early 1990's, Michael knew he couldn't put a dish such as braised beef cheeks on his menu the same way he could other cuts of meat that his diners were used to. Enter "the humble pierogi." Michael came up with the great idea to put something people hadn't seen before (beef cheeks) into something they were comfortable with (pierogies). The idea took off and this remains Michael's signature dish to this day. You can try Michael's version the next time you dine at Lola or you can make them at home using his cookbook or by following my description below. This recipe has a lot of steps, but don't let it intimidate you.
Michael loves to work with offal cuts of meat like cheek meat, sweet breads, liver, marrow, and other cuts of meat deemed inedible by many people. In the early 1990's, Michael knew he couldn't put a dish such as braised beef cheeks on his menu the same way he could other cuts of meat that his diners were used to. Enter "the humble pierogi." Michael came up with the great idea to put something people hadn't seen before (beef cheeks) into something they were comfortable with (pierogies). The idea took off and this remains Michael's signature dish to this day. You can try Michael's version the next time you dine at Lola or you can make them at home using his cookbook or by following my description below. This recipe has a lot of steps, but don't let it intimidate you.

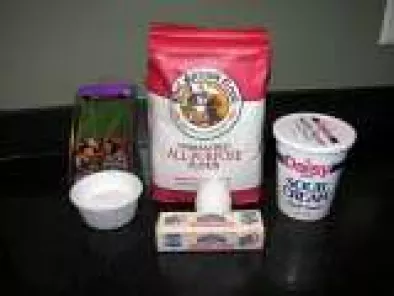
Pierogie dough ingredients
This recipe made me really happy I took the pasta making class at The Greenhouse Tavern because I'd never used the well method (or any other method for that matter) for making pasta or dough. If you haven't made a dough like this before, don't be intimidated, it's pretty easy to do as long as you aren't afraid to make a mess.
Begin by mixing the egg, sour cream, butter, chives, and salt in a bowl. The book says to use your hands and form a dough. I found a fork worked just as well as my hands and I wouldn't really consider the end result a dough because it is very thin.
Begin by mixing the egg, sour cream, butter, chives, and salt in a bowl. The book says to use your hands and form a dough. I found a fork worked just as well as my hands and I wouldn't really consider the end result a dough because it is very thin.

Flour well with "dough" mixture in the background
Hopefully you can see the consistency of the "dough" in the bowl in the picture above. I wouldn't consider it a dough.
Next, weigh out the flour and create a well in the middle on the counter. Now it's time to get dirty! Flour your hands, pour some of the sour cream mixture into the well, and begin mixing it all together. Keep plenty of flour on your hands to prevent the sour cream mixture from sticking to your hands.It will stick no matter what, but the flour really seemed to help.
Next, weigh out the flour and create a well in the middle on the counter. Now it's time to get dirty! Flour your hands, pour some of the sour cream mixture into the well, and begin mixing it all together. Keep plenty of flour on your hands to prevent the sour cream mixture from sticking to your hands.It will stick no matter what, but the flour really seemed to help.

This dough is very sticky
Continue mixing and kneading the mixture until the dough forms. You can see a close up of me mixing the dough during my interview with channel 3. Once the dough is formed, wrap it in plastic wrap and refrigerate it for at least 2 hours. I left it in the fridge overnight and used it the next morning during the interview.The dough will be easier to work with if it is chilled.

Ingredients for the braised beef cheeks
Now it's time to braise the beef cheeks. This step also requires some additional resting time so be sure to do this early in the day or better yet, a day or two in advance. You may be wondering where to find beef cheeks? You aren't going to find them at your neighborhood Giant Eagle or even Heinen's. I got mine from Millgate Grass Fed Beef Farm at the Shaker Farmer's Market. Beef cheeks can also be found at the Westside Market, although I recommend placing an order with a vendor before hand rather than assuming you can just show up and find some. If you can't find cheeks, you could substitute beef shoulder or other tougher cuts of beef that are best braised. Pork or lamb would also be very good.
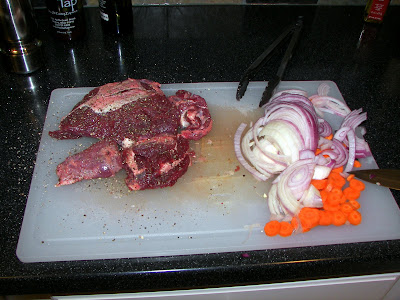
Trimmed beef cheeks, chopped carrots & onions
The first step is to trim some of the fat off the cheeks and season them with salt and pepper. 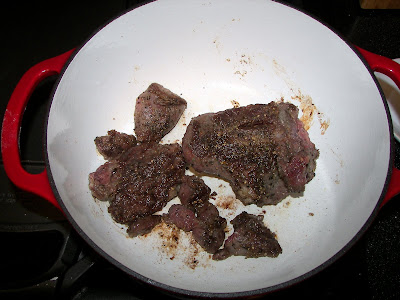
Beef cheeks browning in the dutch oven
Next, add the cheeks to a medium hot dutch oven and brown all sides. Once browned, remove the cheeks from the pan and add the carrots and onions to the fat from the cheeks and cook them until soft, seasoning along the way. Then add the garlic and cook for another minute or so before adding the vinegar, wine, thyme, bay leaf, and stock to the dutch oven. Bring this mixture to a simmer, add the beef cheeks, cover, and put it in the oven for 1 hour at 325, then lower the temperature to 225 for another 4 hours. 
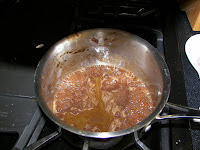
Cheeks cooling in the braising liquid
Once the meat is very tender (I probably only braised for 3 hours total), remove it from the oven and let it cool before putting in the fridge over night. I assume Michael does this to let the flavors enhance so if you are crunched for time you could probably skip this step.

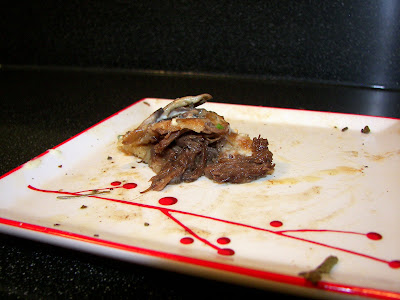
Pulled cheek meat
When you are ready to put the pierogies together, remove the cheeks from the braising liquid and pull the meat into small pieces as shown above.
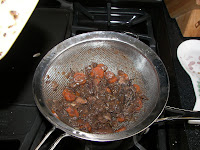
Straining the braising vegetables & reducing the braising liquid
Next, strain the braising liquid and boil the liquid until it reduces and begins to thicken. Feel free to snack on the braised veggies. Isabel, my 1 year old daughter, loved eating them! Once the liquid thickens, mix it together with the pulled beef cheeks. Voila, delicious pierogi stuffing. Wasn't that easy?
This delicious braised meat would also be amazing served over pasta or rice if you don't want to go to the trouble of turning it pierogies.
This delicious braised meat would also be amazing served over pasta or rice if you don't want to go to the trouble of turning it pierogies.

Fresh formed pierogies
Finally comes the fun part, making the actual pierogies. This part is pretty easy, just be sure to have plenty of flour down on the counter, the rolling pin, and on your hands! Remove the dough from the fridge and roll it out to your desired thickness, I did mine to about 1/8". The recipe then says to cut 3" circles out of the dough, but I found that to be too small - it was tough to stuff them when they were that small - so I used a cup that was 4" wide to cut the dough. You can really make them any size you like. My wife comes from a very large Polish family and pierogies are a staple at family gatherings. Their gatherings usually have 20+ people at them so rather than take the time to make regular size pierogies, they make them the size of mini footballs to cut down on the number that have to be formed. One would argue whether or not it also cuts down on the number you need to eat. :)
Once the dough is cut, remove the remaining dough and reform it to be rolled out again. Then grab a tablespoon or so of the beef cheek filling, put it in the middle of the cut dough, fold the dough over to create a half moon, and use a fork to seal the dough. When you are done, they should look the picture above. Once formed, I put the pierogies onto a floured Silpat pad and put it in the fridge until I was ready to cook them. They also freeze well, I have lots of leftovers in my freezer from all my practice rounds before the interview.
Again, the most important thing about this part of the recipe is to use lots of flour to keep the dough from sticking to things - keep the counter, rolling pin, and your hands well floured! You can see close ups of me rolling, cutting, and stuffing the pierogies during my interview with channel 3.

Boiled pierogies
Alright, we're in the home stretch now. When you are ready to serve them, remove them from the fridge or freezer, bring a pot of water to a boil, season it heavily with salt, and drop in the pierogies. Frozen pierogies do not need to be defrosted prior to cooking them. The pierogies will float when they are done cooking, about 3-5 minutes. At that point, remove them from the water and allow them to drain. If you are trying to be healthy, you can eat them at this point or you can fry them to give them a nice crunch. To fry them, melt butter, or even better, bacon grease, in a skillet and fry them until golden brown on each side. Don't try to turn them too quickly. When they are done, they will easily release from the pan.
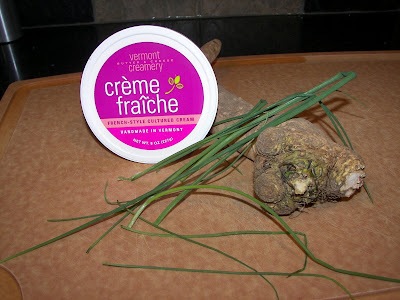
I cheated & used store bought creme fraiche
Unfortunately, I didn't read through the recipe for the horseradish creme fraiche (p. 139) until it was too late to make the it completely from scratch. Fortunately, prepared creme fraiche is available at Heinen's so I bought some and mixed in fresh grated horseradish root, chopped chives, salt, and pepper. It seems pretty easy to make creme fraiche so I will definitely try it next time. Another thing I would do differently is to use white pepper rather then black and I'd put the chives on top of the pierogies and creme fraiche mixture rather than mixing it in. It would make for a better presentation. Compare the picture below to the picture in the book and you'll see what I mean.

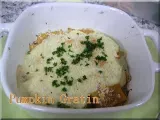
Plating on Easter
Finally, after 4 days of cooking, I got to try Michael Symon's Beef Cheek Pierogies. This notthe best picture, but the taste is all that really matters and they were amazing! The pierogies are topped with the horseradish creme fraiche and Michael Symon's Seared Mushrooms (p.158) that I made at Christmas time.
Delicious, tender beef cheek filling
If you're still with me, I'm impressed! This is a very involved recipe. I'm exhausted (and hungry) just writing about it. Like most of Michael's recipes, none of the individual steps are that difficult, but it is definitely time consuming. Because of the interview, I stretched this recipe out over 4 days, but there's no reason why it couldn't all be done in 1 long day or spread out over a couple hours of a couple days. Either way, the results make the effort worth while. I could see the braised cheeks by themselves becoming a staple in our dining room. The pierogies are amazing, but the braised beef cheeks are what really make the dish. Like I mentioned before, the braised cheeks would also be amazing served over pasta, rice, dumplings, or just served alone. Doing it that way would cut more than half the cooking time out of the process.I have a feeling I will use this braising technique quite a bit next winter. If cheek meat is not your thing, you can also just make the dough and stuff it with potato, cheese & potato, cabbage, sweets, or anything else you can think of.
What is your favorite pierogi filling?
What is your favorite pierogi filling?
Cost
I will provide the approximate cost for each recipe in the book, as well as the source of the products used.
It cost about $35.48 to make 33 of Michael Symon's Beef Cheek Pierogies with Wild Mushrooms and Horseradish .
Pierogie Dough:$1
Misc - $1 (egg, sour cream, butter, chives, salt)
Beef Cheeks: $20.50
Beef cheeks - $16.50 (Millgate Grass Fed Beef Farm)
Red onion - $1 (Heinen's)
Red Tree Petite Syrah - $1 (Heinen's)
Misc - $2 (olive oil, flour, carrot, garlic, red wine vinegar, thyme, bay leaf, homemade chicken stock)
Seared Wild Mushrooms: $9
Shiitake and Oyster Mushrooms - $8 (Killbuck Valley)
Misc (Olive oil, salt, thyme, shallots, garlic, & butter) - $1
Horseradish Creme Fraiche: $4.99
Vermont Creamery Creme Fraiche - $3.99
Misc - $1 (fresh horseradish root, chives)
Subscribe to Live to Cook...At Home by Emailb


Live to Cook...At Home
Comments
Rate this recipe:
There are no comments!