Parotta / Indian Layered Bread - Stepwise Pictures

Parotta is one of the most interesting dish not just to eat but to make as well :)
I have loads of memories of admiring the road side parotta stalls. The parotta master(that is how the chef is called locally :P) does it so tactfully and with ease. He literally flies the dough in the air to expand it rather than rolling on the workspace and its such a treat to watch them do that :) The end result of such magic would be a super flaky and layered parotta.
Parotta has been my favorite since childhood. I remember making them all by myself when I was doing my ninth class ;) and have become almost an expert in making them ever since ;)
Parotta can be made in various methods and I have seen lot of people following harder methods and calling it difficult to make as well. So just thought of posting the method that I follow which isn't as hard as we think!!
Come on.. give it a try :) I'm sure you would love it too :)
Ingredients:
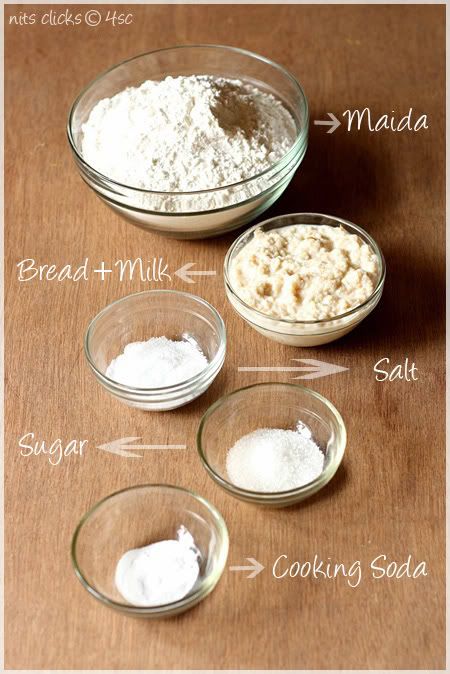
All purpose flour - 4 cups
Bread - 5 slices
Milk - 1 cup
Sugar - 2 tsp
Cooking soda - 1/2 tsp
Salt - for taste
Water - adequate for making dough
All purpose flour - 4 cups
Bread - 5 slices
Milk - 1 cup
Sugar - 2 tsp
Cooking soda - 1/2 tsp
Salt - for taste
Water - adequate for making dough
Method to make dough:
Crumble the bread and add it to the milk. Mix it well with your hands till it becomes into a paste.
Take the maida, salt, cooking soda and sugar in a bowl. Add the bread and milk mixture to it and mix well. Add adequate water to it and make dough. Kneed the dough for fifteen minutes. Make a huge ball and apply few drops of cooking oil on top and leave it aside in a bowl for atleast for two hours.
Method to make Parotta:
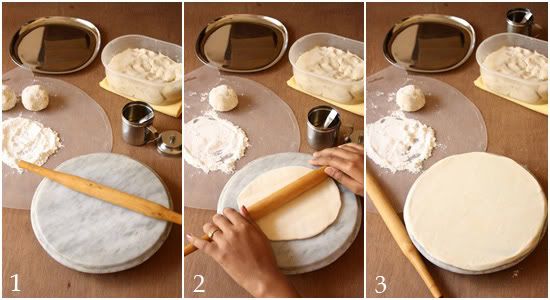
Set your work surface ready. Pinch large lemon sized balls from the dough and roll into balls. Spread a cup of maida on a paper. Keep half a cup of cooking oil ready.
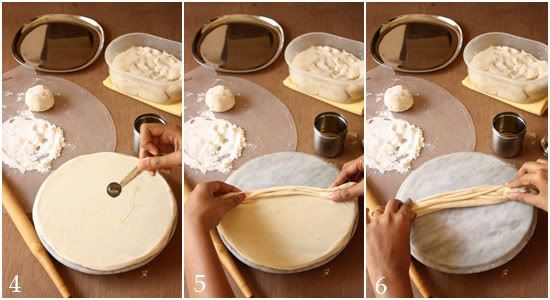
Roll the ball of dough into a circle of 3mm thickness.Roll until it is pretty big or until it is as big as your work space.
Roll the ball of dough into a circle of 3mm thickness.Roll until it is pretty big or until it is as big as your work space.
Brush one tsp of oil on the rolled dough.
Now fold like a fan or saree pleats from one end to another.
Hold the ends with your hands firmly.
Now fold like a fan or saree pleats from one end to another.
Hold the ends with your hands firmly.
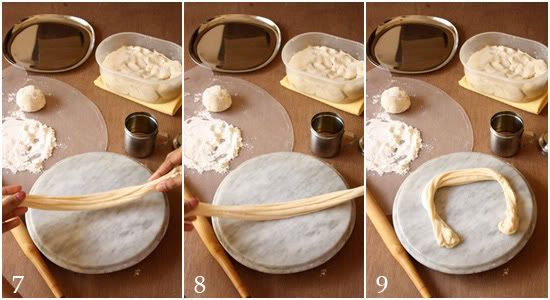
Lift it and tap it on the stone.
Now pull it slightly while tapping until it becomes a bit longer.
Roll from one end to another.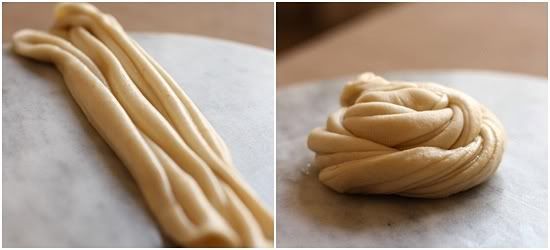
Now pull it slightly while tapping until it becomes a bit longer.
Roll from one end to another.
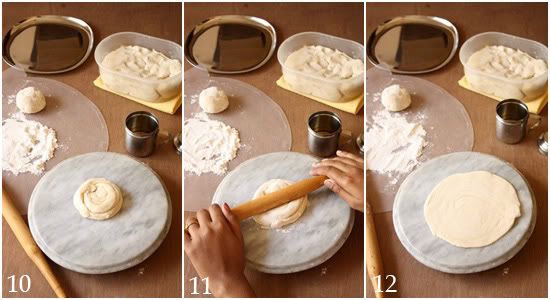
Seal the end by pressing it on top.Dust the work space and the rolled ball with some flour.Roll it again into a slightly thicker circle. Keep in mind not to press it too hard while rolling which will merge the layers.
Roast the Parotta on a skillet adding few drops of oil on both the sides. Keep the flame on midium and roast until you get golden brown spots all over.
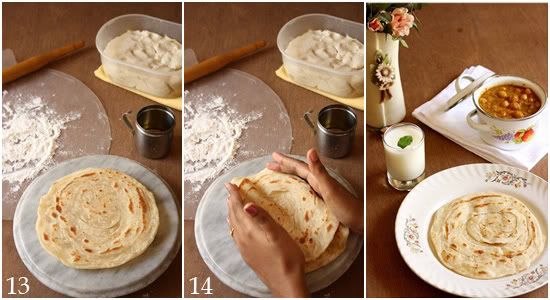
Stack two or three parottas together and beat them well with two hands on the sides to make them flaky.Soft and yummy parotts are ready to eat.
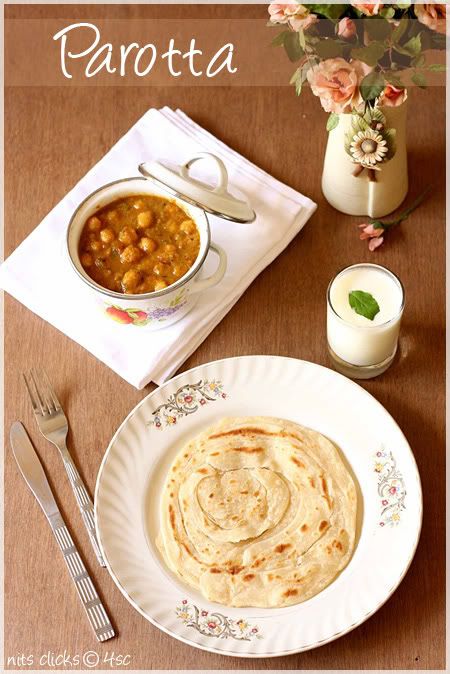
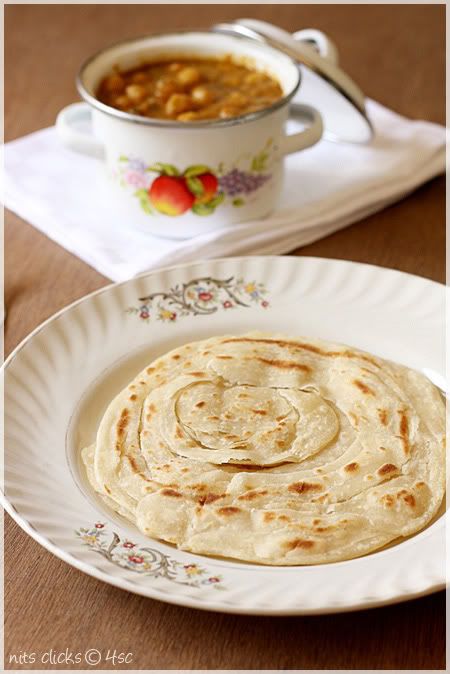
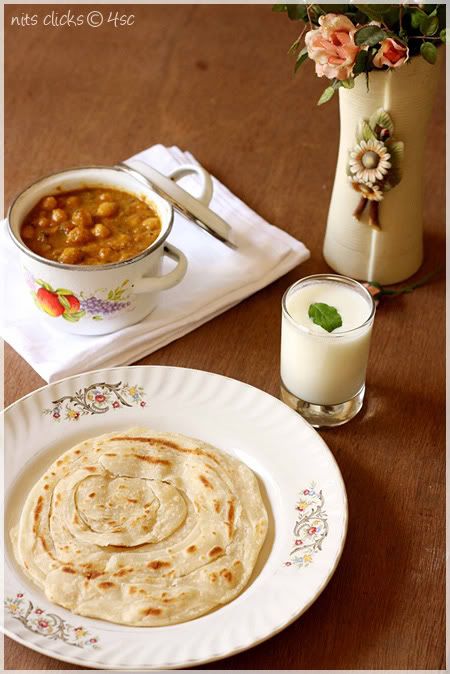
Serve them hot with subzi of your choice. I served it with channa masala.
This quantity would make approximately 25 parottas.
Enjoy making :) Happy eating :)
Stack two or three parottas together and beat them well with two hands on the sides to make them flaky.Soft and yummy parotts are ready to eat.
Serve them hot with subzi of your choice. I served it with channa masala.
This quantity would make approximately 25 parottas.
Enjoy making :) Happy eating :)
Tips:
Use fresh bread for making the dough. The yeast in the bread will make help in making the parottas soft.
Beating the roasted parottas is a very essential step to make it flaky and expose the layers.
Use fresh bread for making the dough. The yeast in the bread will make help in making the parottas soft.
Beating the roasted parottas is a very essential step to make it flaky and expose the layers.

Written by: Nithya
Send in your queries by clicking here.

Send in your queries by clicking here.
4th Sense Cooking
Comments