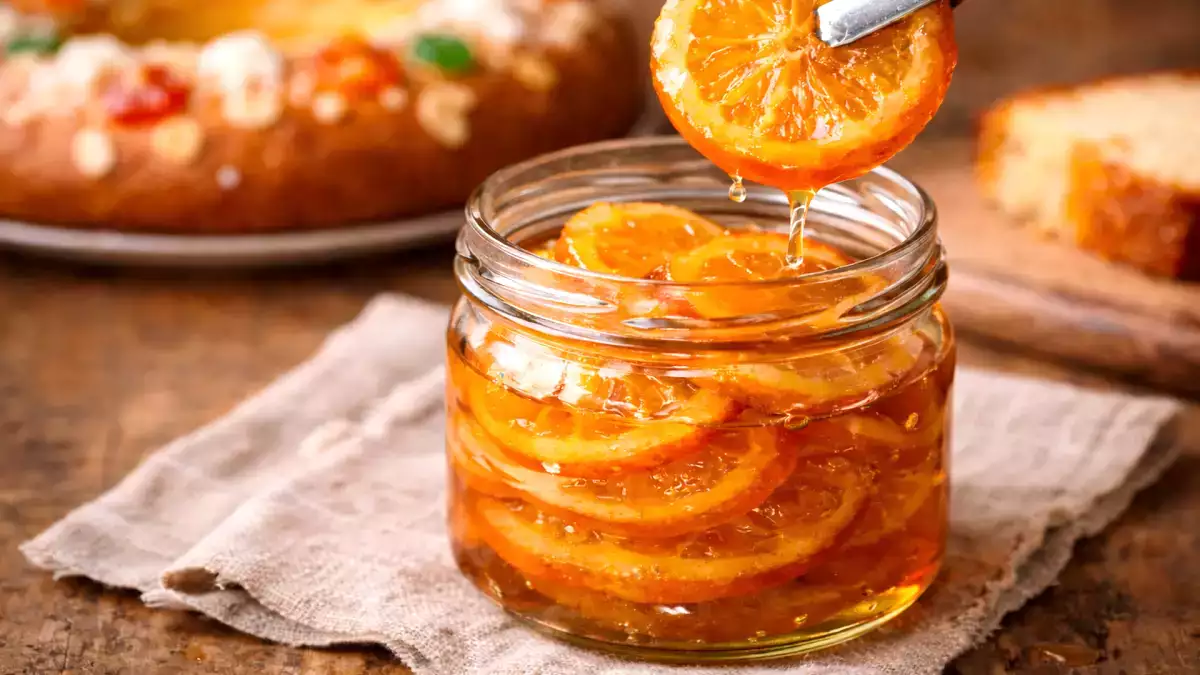
Candied oranges bring elegance, color and zing and make every dessert feel homemade and festive
Candied oranges are proof that sometimes patience really does pay off. You bring the oranges, sugar, water, and a pot; time does the rest while you pretend you’re “just keeping an eye on it.” Over low heat, each slice slowly goes from “bright, zesty citrus” to “edible amber” and, as a bonus, leaves you with a syrup that makes almost anything better without even trying: yogurt, cakes, ice cream, buttered toast, a simple chocolate cake that suddenly feels very serious.
Were they supposed to be for the holiday bread? Sure. But once you’ve got a jar in the fridge, you start using them like salt: a little here, a little there, and everything tastes more interesting. And if you dip them halfway in dark chocolate… there’s really no going back.
What “candied” actually means (and how it’s different from just boiling an orange)
To candy fruit is to cook it slowly in syrup so the sugar gradually works its way in. You’re not looking for jam, caramel, or rock-hard slices. You want:
- a light translucence,
- a glossy finish,
- and a flexible texture that bites cleanly without breaking.
Two choices really determine the result:
- Slice thickness: too thin and they fall apart; too thick and they feel endless to chew.
- Heat level: this is not a rolling boil situation; you want the gentlest simmer, almost shy.
Good oranges are the real key
You’re going to eat the peel (and some of the white pith), so it’s worth choosing oranges that are:
- firm and heavy for their size, with smooth skin,
- well washed; if you suspect wax, scrub with hot water and a brush, then dry thoroughly.
Ingredients (for a generous jar)
- 4 oranges
- 300 g sugar (about 1½ cups)
- 150 g water (about ⅔ cup)
Step-by-step: candied orange slices
1) Wash and slice
Wash the oranges very well. Slice into rounds about 2–3 mm thick (roughly ⅛ inch).
Thicker slices take forever and candy unevenly; thinner ones tear easily.
2) Optional: blanch to reduce bitterness
If you want a softer, less bitter peel:
- Bring a pot of water to a boil.
- Drop in the slices for 1 minute.
- Remove and cool quickly in cold water.
You’re not “killing” the orange, just taking the edge off the bitterness.
3) Make the syrup
In your pot, add the water + sugar and heat until the sugar is completely dissolved.
This little step helps prevent gritty sugar crystals or weird textures later.
4) Cook in two stages (very, very low heat)
- Slide the orange slices into the hot syrup in a single or slightly overlapping layer.
- Cook 30 minutes uncovered over low to medium-low heat (just a soft bubble).
- Then cover and cook 45 minutes on the lowest heat.
Logic:
- First phase: reduce the syrup a bit and start the candying.
- Second phase: covered and super low, you finish gently without over-evaporating or “toasting” the sugar.
5) Don’t stir, nudge
This is the line between pretty slices and a shredded mess:
- Don’t stir with a spoon like it’s soup.
- If a slice is sticking out, gently press it down with the back of a wooden spoon or give the pot a small, careful shake.
6) Cool in the syrup (non-negotiable)
Turn off the heat and let the slices cool completely in the syrup.
Once they’re cold, their structure sets and the finish is much cleaner and more stable.
Three ways to finish them (pick based on how you’ll use them)
A) Stored in syrup - the “pastry shop” style
Keep the slices in a jar, fully covered with their syrup. They’ll stay plump and glossy, perfect for:
- folding into cake or pound cake batters,
- topping cheesecakes, tarts, yogurt, ice cream, or breakfast bowls.
B) Drained and dried - for decoration
Lay the slices out on a rack and let them drain.
For a firmer, more “candied peel” texture, leave them to dry for several hours or overnight.
They’re perfect on:
- chocolate cakes,
- Bundt cakes and loaf cakes,
- simple snack cakes that need a little glow-up.
C) Half-dipped in chocolate – guaranteed gift material
Once the slices are well drained and a bit drier:
- Dip half of each one in melted dark chocolate.
- Set them on parchment and let the chocolate firm up.
The dark chocolate + citrus contrast is instant classic territory and a beautiful homemade gift.
Ten ways to use them beyond the holiday bread
- Over plain yogurt with a spoonful of syrup.
- On fresh cheese or ricotta, with a few chopped nuts.
- On top of a chocolate cake, suddenly it looks like a pâtisserie window.
- Chopped and folded into a simple pound cake or muffin batter.
- With vanilla or sweet cream ice cream (plus just a bit of syrup).
- Pressed into butter cookie dough: a small slice on top before baking.
- On a cheese board, especially with aged or blue cheeses.
- In a salad with bitter greens (arugula, endive) and something rich (avocado, cheese, toasted nuts).
- In cocktails: one candied slice + a splash of syrup as a sweet twist.
- Packed in a pretty jar with a label and ribbon: a gift that always lands well.
Common mistakes (and how to dodge them)
- They fall apart: slices too thin, heat too high, or too much stirring.
- They’re tough: they needed more real time at low heat, or they dried out too much without enough syrup.
- Too bitter: try the optional blanching step, or make sure the slices aren’t too heavy on the thick white pith (no need to obsess, just be mindful).
- Gritty syrup: the sugar wasn’t fully dissolved at the start. Next time, be patient when you first warm the sugar and water.
- They stick to the bottom: heat too high or a very thin pot. Use a heavy-bottomed pan and keep that simmer gentle.
Storage
- In syrup: in a closed jar in the fridge, fully covered, they’ll last several weeks. Always use clean utensils to take them out.
- Dry: in an airtight container with parchment between layers, in a cool, dry spot.
- Frozen: you can freeze them (best in syrup or arranged separately with parchment so they don’t fuse together). Thaw in the fridge.
 Patricia González
Comments