How to make coral tiles to give an elegant touch to your dishes
In cooking, it's not all about flavor: presentation also speaks for itself. And at Christmas or any special celebration, even more so. Sometimes a dish changes completely thanks to the smallest detail, that final touch that turns an everyday dish into a preparation thought out with intention.
Coral tiles, or lace tuiles, are exactly that: a simple trick that elevates any recipe in seconds. I learned it from a chef at the front of a good restaurant and, when I saw how simple the recipe was, both in ingredients and execution, I was truly surprised. They are prepared at home with three common ingredients and a frying pan, and still achieve a delicate finish that always generates comments at the table.
They work just as well on an appetizer as they do topping a cream, a fish dish or even a dessert. If you're looking for a detail to spruce up your festive dishes or any special menu, these tuiles are a perfect starting point. Here's how to make them.
What exactly are coral tiles?
They are an edible decoration with a lace-like appearance, created when a mixture of water, oil and flour is cooked over high heat and the water evaporates, leaving those irregular holes that resemble a piece of coral. They are light, thin and very eye-catching. Moreover, they work in almost everything: appetizers, main dishes, desserts and any recipe that calls for an eye-catching touch.
Ingredients and proportions
The base is so simple that it is surprising:
- 1 Tbsp flour
- 1/4 cup sunflower oil
- 3.5 Tbsp of water (at room temperature)
- Drops of food coloring (optional)
- A pinch of salt for salty versions (optional)
This proportion is the one that best balances the texture: a fluid mixture that creates large hollows and a nice, thin tile.
How to make a coral tile step by step
To make the coral tile:
1. Prepare the mixture: Place the water, oil, flour and a pinch of salt (optional) in the mixer bowl. Grind until you obtain a completely homogeneous dough, similar to that of very thin crêpes.
2. Heat the frying pan: Heat a non-stick frying pan in good condition. The temperature is fundamental: if it does not reach enough heat, the tile will not develop the characteristic holes.
3. Cook the tile: Pour a splash of mixture in the center of the pan and cook over medium heat. With the heat, the surface will begin to bubble and open up in an irregular pattern. The tile will gradually dry and harden.
4. Remove and cool: When firm, remove carefully using a spatula. Transfer it to absorbent paper and let it cool completely before handling.
If you want to add color:
Before cooking, divide the mixture into one or more bowls if you want different shades. Add a few drops of food coloring (in this case, red) and mix well. Adjust the quantity until the desired shade is obtained and continue with the recipe.
Result: a haute cuisine decoration in less than five minutes.
Common mistakes and how to fix them
- The holes do not appear: the pan was not hot enough.
- The tile breaks when it is removed: it was not cooked for a few seconds. Give it a little more time.
- It is oily: reduce the oil a little or clean the pan between one tile and another.
- The mixture is too thick: add a splash of water to adjust it.
How to use them in your Christmas dishes
- On creams and Christmas soups: a pumpkin, chestnut or mushroom cream changes completely if you place a tile on top. It adds verticality and breaks the visual monotony of the dish.
- In white fish dishes: hake, cod or turbot with a mild sauce, a tile is very well accepted to provide lightness and a decorative point. In addition, it creates a contrast between the uniformity of the fish and the aerial texture of the tile.
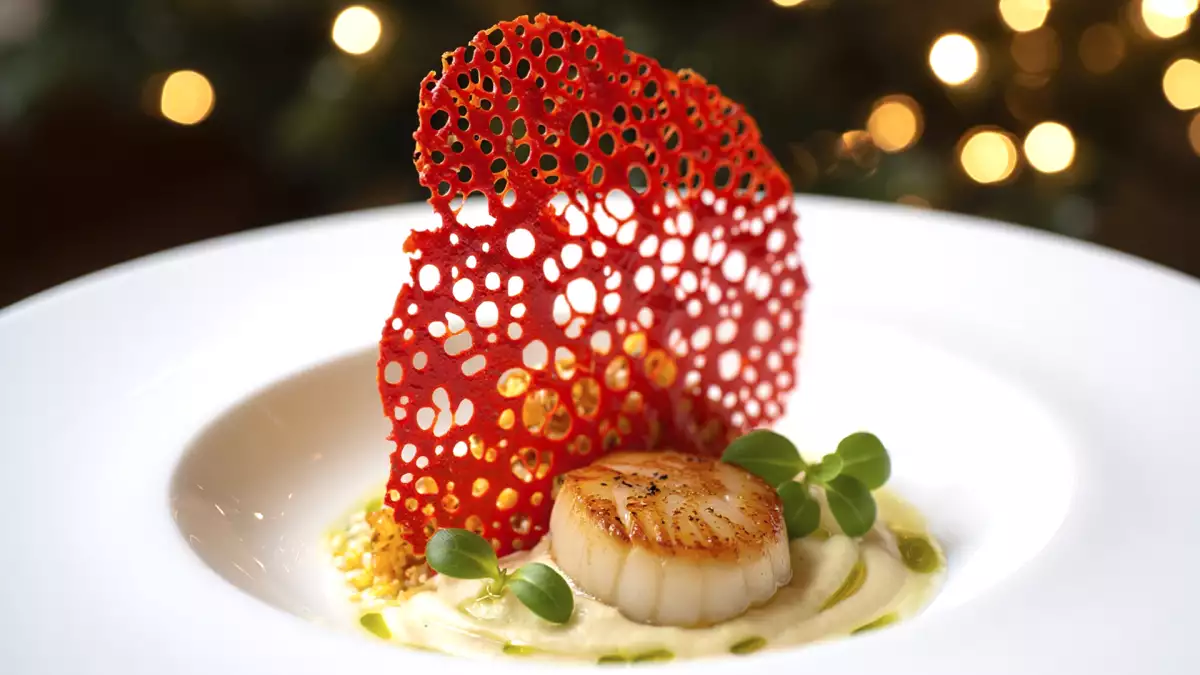
- In scallops or shellfish: a marked scallop and a red or golden coral tile on top is pure restaurant. It looks elegant without being complicated.
- In snack appetizers: on a brandade, a salmon mousse, a tartar or a cream cheese canapé. The tile acts as a mini "lid" that anticipates what lies underneath.
- In cold Christmas dishes: warm salads, carpaccios or vegetable slices need volume. A tile provides that "visual punch" that makes the difference.
- In desserts: on a panna cotta, a flan, a creamy chocolate or a glass of spiced yogurt. The tile works as a light and decorative counterpoint.
The chef's tip: Always place it at the highest point of the plate, slightly tilted, as if it were resting on an ingredient. That creates a more interesting structure and makes the tile appear to be part of the dish, not "put on for the sake of putting on".
And an extra detail:
If you prepare shingles in holiday colors (red, green, gold), use them strategically to mark components of the dish:
red → on seafood or desserts
golden → for white meats, fish and festive sweets.
The Christmas detail that transforms your recipes
Coral tiles are that quick and surprising trick that gives your dishes a twist without asking for time or technique. Three ingredients, one pan and two minutes: just enough to make your holiday recipes look a lot more thought out than they really need to be.
 Patricia González
Comments