Beef roast turns out dry instead of juicy? These mistakes explain why
Sunday 15 November 2026 10:00 - Juliette Hess
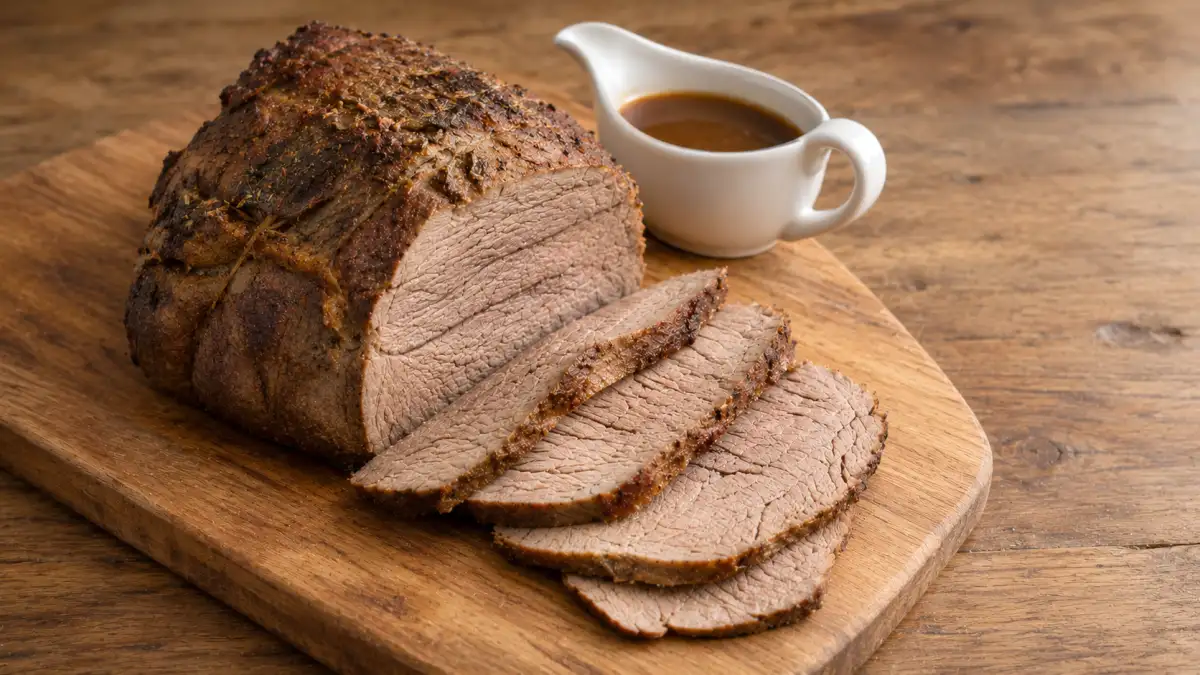
Here's the good news: dry roast beef usually has an explanation, and there are several ways to avoid it next time. The biggest mistakes often happen before carving: choosing the wrong cut, cooking by the clock alone or skipping the resting time. We'll show you what matters, what doesn't and how to rescue today's roast without pretending gravy can turn back time.
Why does roast beef turn out dry?
Most often, the meat has lost too much moisture as it cooks. Heat causes muscle proteins to tighten and push out some of their juices. The further a lean roast cooks beyond its ideal finish, the drier its slices can feel.
But not every tough roast is overcooked. A chuck roast, for example, contains connective tissue that needs long, gentle, moist cooking to soften. Pull it out of a dry oven too early and it may be chewy, even though it's fully cooked. That's different from a lean top round roast that's become dry after too much time in the oven.
So before adding more heat, ask one question: which cut did you buy? The answer changes the solution.
But not every tough roast is overcooked. A chuck roast, for example, contains connective tissue that needs long, gentle, moist cooking to soften. Pull it out of a dry oven too early and it may be chewy, even though it's fully cooked. That's different from a lean top round roast that's become dry after too much time in the oven.
So before adding more heat, ask one question: which cut did you buy? The answer changes the solution.
Choose the cut that matches your cooking method
For classic sliced roast beef, look for a rib roast, sirloin roast or tenderloin, depending on your budget. Leaner round roasts are common too, but they offer less margin for error. Their slices benefit especially from careful temperature checks and thin carving.
Chuck and similar well-worked cuts are better suited to covered braising with broth than a quick, dry roast. Their connective tissue gradually softens during a long, gentle cook. If your package says pot roast, follow a pot-roast method rather than a dry-heat roasting recipe.
And don't assume the most expensive cut is automatically the easiest. Even tenderloin can dry out when left in the oven too long. The method and thermometer matter as much as the price tag.
Chuck and similar well-worked cuts are better suited to covered braising with broth than a quick, dry roast. Their connective tissue gradually softens during a long, gentle cook. If your package says pot roast, follow a pot-roast method rather than a dry-heat roasting recipe.
And don't assume the most expensive cut is automatically the easiest. Even tenderloin can dry out when left in the oven too long. The method and thermometer matter as much as the price tag.
The thermometer beats guessing by minutes per pound
A roast's thickness, shape, starting temperature and your oven all affect cooking time. That's why the clock is a guide, not a doneness test. Insert a meat thermometer into the thickest part, away from bone and large pockets of fat.
For home food safety, the USDA recommends cooking whole beef roasts to an internal temperature of 145°F (63°C), followed by at least a three-minute rest. Its general roasting guidance uses an oven temperature of 325°F or above. Check early enough to avoid overshooting your target, and remember that a large roast can continue warming after leaving the oven.
If you're serving guests, verify the temperature rather than judging it by color or the amount of juice on the cutting board. Pinkness alone isn't a reliable safety check.
For home food safety, the USDA recommends cooking whole beef roasts to an internal temperature of 145°F (63°C), followed by at least a three-minute rest. Its general roasting guidance uses an oven temperature of 325°F or above. Check early enough to avoid overshooting your target, and remember that a large roast can continue warming after leaving the oven.
If you're serving guests, verify the temperature rather than judging it by color or the amount of juice on the cutting board. Pinkness alone isn't a reliable safety check.
Give the roast a proper rest before slicing
We know the temptation: the roast smells wonderful, everyone's hungry and the knife is already in your hand. But carving it immediately makes it harder to retain moisture in the slices.
Set the meat on a board, cover it loosely with foil if needed and let it rest. A larger roast often benefits from about 15 to 20 minutes, while still respecting the USDA's minimum rest for safety. Use the thermometer to account for the rise in temperature during resting.
Then find the direction of the muscle fibers and slice across the grain, not along it. Thin slices cut against those fibers feel easier to chew, especially with lean round roast. It's a tiny change that makes a noticeable difference at the table.
Set the meat on a board, cover it loosely with foil if needed and let it rest. A larger roast often benefits from about 15 to 20 minutes, while still respecting the USDA's minimum rest for safety. Use the thermometer to account for the rise in temperature during resting.
Then find the direction of the muscle fibers and slice across the grain, not along it. Thin slices cut against those fibers feel easier to chew, especially with lean round roast. It's a tiny change that makes a noticeable difference at the table.
Don't try to fix a dry roast by cooking it harder
If the center is already cooked and the slices seem dry, returning the roast to a hot oven won't put the moisture back. A hotter blast can make the problem worse. Instead, slice it thinly and spoon over warm pan gravy or a little beef broth just before serving.
For a quick gravy, pour off excess fat from the roasting pan, add roughly 1 cup low-sodium beef broth and gently scrape up the browned bits. Simmer briefly, taste and thicken if you like. Avoid using burned black residue, which can turn the sauce bitter.
One exception: if you're actually making a chuck pot roast and it's still firm, keep braising it gently with enough liquid until it's fork-tender. That helps connective tissue soften; it's not the same as rescuing overcooked lean beef.
For a quick gravy, pour off excess fat from the roasting pan, add roughly 1 cup low-sodium beef broth and gently scrape up the browned bits. Simmer briefly, taste and thicken if you like. Avoid using burned black residue, which can turn the sauce bitter.
One exception: if you're actually making a chuck pot roast and it's still firm, keep braising it gently with enough liquid until it's fork-tender. That helps connective tissue soften; it's not the same as rescuing overcooked lean beef.
Three easy habits for a juicier roast next time
First, read the cut name before choosing a recipe. A covered pot roast and an uncovered rib roast aren't interchangeable. Second, preheat the oven and start checking the center before the estimated finish time. Don't leave the thermometer until the last minute.
Third, plan the resting and carving time as part of dinner. If the roast finishes a little earlier than expected, you have breathing room for the potatoes and vegetables. If it finishes late, don't skip the rest simply to catch up.
For leftovers, refrigerate promptly in shallow containers within two hours and reheat thoroughly to 165°F. Thin slices are excellent in sandwiches or tossed into a warm sauce. And yes, yesterday's roast can still make a very good lunch!
Third, plan the resting and carving time as part of dinner. If the roast finishes a little earlier than expected, you have breathing room for the potatoes and vegetables. If it finishes late, don't skip the rest simply to catch up.
For leftovers, refrigerate promptly in shallow containers within two hours and reheat thoroughly to 165°F. Thin slices are excellent in sandwiches or tossed into a warm sauce. And yes, yesterday's roast can still make a very good lunch!
A juicy roast is about control, not luck
A good beef roast doesn't need complicated tricks or constant basting. Choose the right cut, monitor the internal temperature, rest the meat and carve against the grain. Those steps do far more than pouring extra liquid over a roast that's already dry.
And if today's dinner didn't go as planned? Serve the beef thinly sliced with gravy, enjoy the sides and keep the lesson for next time. Even experienced cooks occasionally get a roast wrong. The important part is knowing what to change before the oven goes on again ;-)
And if today's dinner didn't go as planned? Serve the beef thinly sliced with gravy, enjoy the sides and keep the lesson for next time. Even experienced cooks occasionally get a roast wrong. The important part is knowing what to change before the oven goes on again ;-)
 Juliette Hess
I have been creating culinary content for Petitchef since 2017.
I love travelling and discovering new dishes, trying out new food trends and exploring new restaurants.
I’m a huge fan of pasta and noodles in all their forms ❤ from udon noodles to tagliatelle, I love cooking them and even making them from scratch!
I’m currently preparing, filming and photographing your next recipe, and I hope you’ll enjoy it!
I love travelling and discovering new dishes, trying out new food trends and exploring new restaurants.
I’m a huge fan of pasta and noodles in all their forms ❤ from udon noodles to tagliatelle, I love cooking them and even making them from scratch!
I’m currently preparing, filming and photographing your next recipe, and I hope you’ll enjoy it!
Comments