How to grill corn on the cob perfectly: simple steps to tender, sweet kernels with a smoky flavor
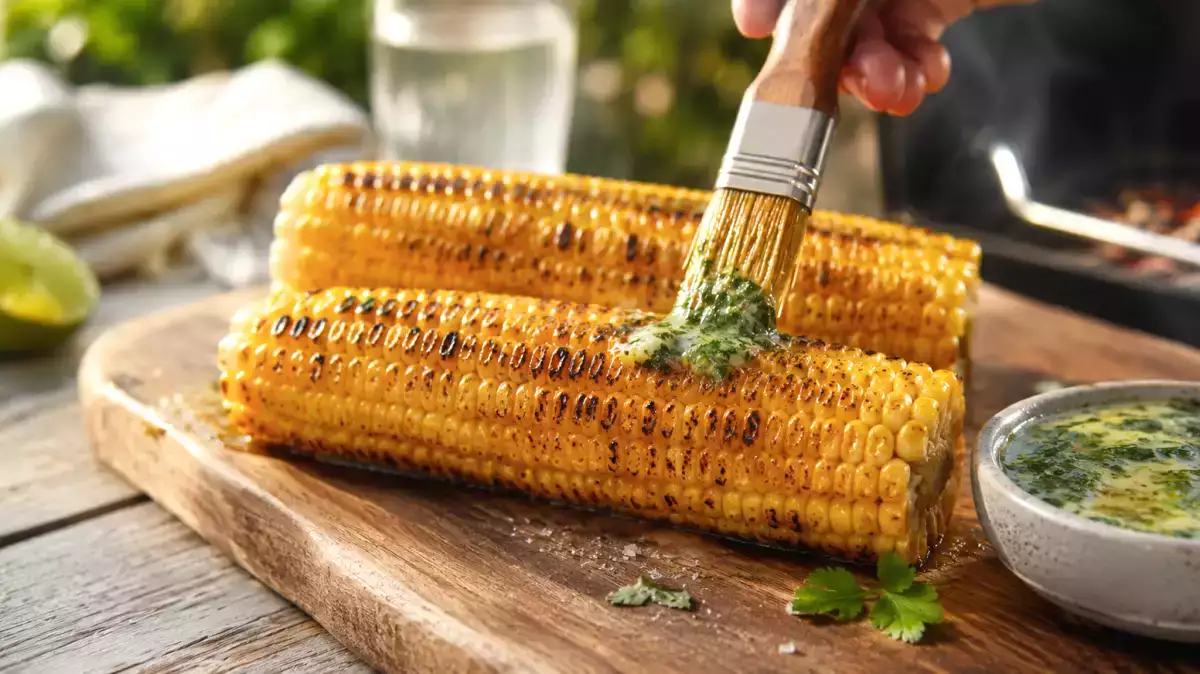
You’ve seen them a thousand times in American movies and TV shows: a backyard barbecue, someone flipping burgers, a table with coleslaw , and, next to it, golden, shiny ears of corn with butter melting between the kernels. They seem like the easiest side dish in the world. And they are, more or less. Until you stand in front of the grill and ask yourself the obvious questions: Do you just put them on as is? Do you have to cook them first? How long do they take? Do the ears of corn from the supermarket come pre-cooked?
Let’s clear up these questions so you, too, can enjoy this little delicacy at your summer barbecues.
First things first: how to tell if an ear of corn is raw or cooked
The first thing to check is the product itself. It’s corn, yes, but a fresh ear of corn isn’t cooked the same way as a pre-cooked, vacuum-packed one.
Before lighting the grill, check the packaging. Many supermarkets sell pre-cooked sweet corn on the cob, usually vacuum-sealed. It says so right on the package. Those ears have already been cooked, so on the grill they just need to be heated through, browned a bit, and tossed with butter, oil, or your choice of seasoning.
If you buy fresh ears of corn—with or without husks—then you’ll need to cook them from scratch. The kernels need time to become tender. It’s not enough to just put them over the fire for two minutes to get nice grill marks; inside, they’ll still be hard or have a mealy texture.
How to roast fresh corn on the cob
This is the most straightforward method and the one that gives the strongest grilled flavor.
- Remove the husks and silk from the corn cob.
- Brush it with a little oil or butter.
- Place it on the grill over medium or medium-high heat, avoiding direct, intense flames.
- Turn it every 2 or 3 minutes so it browns evenly.
- Cook for about 8–12 minutes, depending on the size of the ear and the intensity of the heat.
- Check for doneness by looking at the kernels: they should be shiny, tender, and have some toasted spots.
- Look for nice grill marks, not a completely charred ear of corn.
This is an ideal method for achieving a flavorful, lightly toasted ear of corn with a hint of smokiness. Be sure to keep an eye on it, as it’s unprotected and can dry out or burn easily.
THE SAFEST TRICK: BLANCH THE FRESH EAR OF CORN BEFORE GRILLING
If you’ve never grilled corn on the cob before, if you’re having guests over, or if the ears are large, this method works best. It involves briefly parboiling them before placing them on the grill.
Bring water to a boil in a large pot. Once it’s boiling, add the fresh, husked corn on the cob and cook for 3 to 4 minutes. Then remove them, drain them well, and place them on the grill with a little oil or butter.
Blanching isn’t a substitute for grilling—it prepares the corn. It helps the kernels start to soften before they hit the grill. Then the heat takes over, browning them, lightly toasting them, and imparting that smoky flavor.
It’s a good option if you don’t want to risk serving a corn on the cob that looks beautiful on the outside but is tough on the inside. It also allows you to better control the result when the grill is full or when you’re cooking several things at once.
CORN ON THE COB WITH HUSKS, WITHOUT HUSKS, OR IN ALUMINUM FOIL: WHAT MAKES THE DIFFERENCE
In addition to whether or not you pre-cook them, how they’re placed on the grill also matters. Corn on the cob can be grilled without husks, with husks, or wrapped in aluminum foil. Each option yields a different result.
- Without husks: This is the simplest method. The corn touches the grill, browns faster, and develops that toasty flavor that’s so appealing at a barbecue. On the other hand, you have to keep a closer eye on it. Since it’s exposed to direct heat, it can dry out or burn easily if the fire is too hot or if you don’t turn it in time.
- With husks: When grilled with their own husks, the kernels are better protected from direct heat. The cob cooks more like it’s being gently steamed: it stays moister and more tender, though with less of that charred flavor. This is a good option if you’re looking for a juicy texture and don’t mind sacrificing some of the grilled flavor. If you want to soak them beforehand so the husks can better withstand the heat, do so in plain water, not heavily salted water.
- In aluminum foil: Another option is to wrap the ears of corn in aluminum foil with butter, salt, pepper, or herbs. This way, they cook evenly and stay juicy, though with less direct contact with the coals. It’s a very practical method if the grill is full, if you want to avoid any mishaps, or if you can’t keep turning them constantly. The downside is that the barbecue flavor will be milder.
How to grill pre-cooked corn on the cob
Vacuum-sealed, pre-cooked corn on the cob is the easiest option to start with. Since they’re already cooked, they don’t need to be cooked for long: just heat them up, brown them, and season them.
Open the package, take out the corn on the cob, and pat them dry a bit with paper towels. Then brush them with butter or oil and place them on the grill over medium-high heat.
Five to eight minutes is usually enough. Turn them several times so they heat evenly and get some grill marks. Since the corn is already partially cooked, the goal is to heat it through and get that nice charred finish from the grill.
The mistake would be to leave them on too long. A pre-cooked ear of corn that spends half the barbecue session on the grill can end up dry on the outside and too mushy on the inside. It’s better to cook them briefly, season them well, and serve them hot.
Three ways to add flavor once they're cooked
Corn on the cob fresh off the grill benefits from a little fat, salt, and an ingredient that brings out its natural sweetness. It’s best to season it while it’s still hot, because the butter melts better and the flavor clings to the kernels.
1. Butter, Salt, and Pepper
This is the simplest version and probably the most popular. Spread butter on the hot corn on the cob, add salt, and finish with a little black pepper. If you want to give it a fresher twist, you can add lemon zest or a few drops of lime juice.
2. Herbed butter
Mix room-temperature butter with chopped parsley. Add a pinch of salt and, if you like, a little finely chopped garlic or garlic powder. Spread this butter over the hot ear of corn and let it melt.
3. Mexican-Style, with Lime and a Kick
If you want a version with more character, you can capture the spirit of Mexican elotes. Spread a thin layer of mayonnaise (or a mixture of mayonnaise and yogurt) over the hot corn on the cob. Add grated or shredded cheese, a little chili powder or hot paprika, and finish with lime. It’s not the lightest version, but it’s certainly one of the tastiest. The sweetness of the corn, the richness, the heat, and the tang work especially well together.
The most common mistake when grilling corn on the cob
The most common mistake is thinking that corn on the cob needs high heat. It doesn't. It needs constant heat.
If there are flames, the kernels will burn on the outside while the cob may remain hard on the inside. It’s best to cook over medium or medium-high heat, turning them often and checking for doneness little by little.
It’s also best not to soak them in heavily salted water, thinking that will make them juicier. With corn, that technique doesn’t work the same way it does with other foods. If you’re going to soak corn on the cob with the husks on so they can better withstand the heat, do so in plain water.
And, above all, don’t leave them unattended. The cob may seem sturdy, but it changes quickly: it goes from golden brown to burnt and from juicy to dry in less time than you’d think.
Once you understand the difference between a fresh ear of corn and one that’s already cooked, all that’s left is to apply the basics: controlled heat, a few turns, a good seasoning, and then it’s time to serve.
 Patricia González
Comments